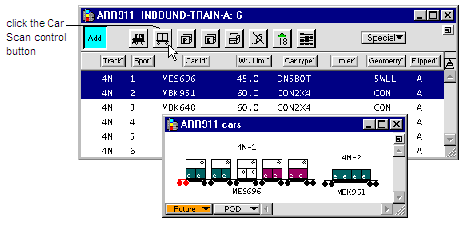
In the top of the train window, click the Car Scan control button  . The
. The
Use this method to quickly scan the contents of one or more cars when assembling, loading, or discharging railcars.
To open a railcar scan view from a train window:
Open a train window. See Open a train window (on page 1), for more information.
In the top of the train window, click the Car Scan control button . The
XPS client displays a railcar scan view.
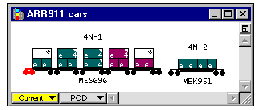
If you have one or more railcars selected in the train window, N4 displays a scan view of the selected cars only.
To scan the whole train, clear any selected railcars by holding down the CTRL key while you click them.
If you do not set the order of the inbound train before scanning the railcars, the scan view displays the railcars in a random order. See Set the order of the train (on page 1) for more information.
To scan non-adjacent railcars, hold the CTRL key while you select the cars you want.
If the car scan view is too wide to fit on your screen, use the scroll bar (scroll left or right) to reveal any hidden railcars.
Optionally, from the main toolbar of the XPS client, select the Magnifying tool  .
.
In the train window, select one or more railcars. Notice that the cursor changes to a scan view symbol  .
.
Choose railcar(s) to scan:
Click to select a single railcar.
or
Drag to select two or more adjacent railcars.
or
Hold down the CTRL key and click to select one or more non-adjacent cars.
The XPS client displays a railcar scan view of the selected railcar(s).
Optionally, from the main menu of the XPS client, select the Pointer tool  .
.
In the train window, select one or more railcars.
CTRL-drag or CTRL-click railcars in the train window.
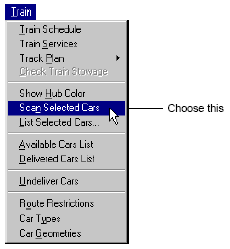
From the main toolbar of the XPS client, select Train  Scan Selected Cars. The XPS client displays a scan view of all of the railcars you selected, in the order you selected them.